
Building a New Fireplace: Patterned Cement Tile Surround
THE DEXTER HOUSE
Last week, I introduced my favorite project at the Dexter House, the new fireplace. When we left off, we had just installed the stove and drywalled/hardiboarded the new fireplace surround.
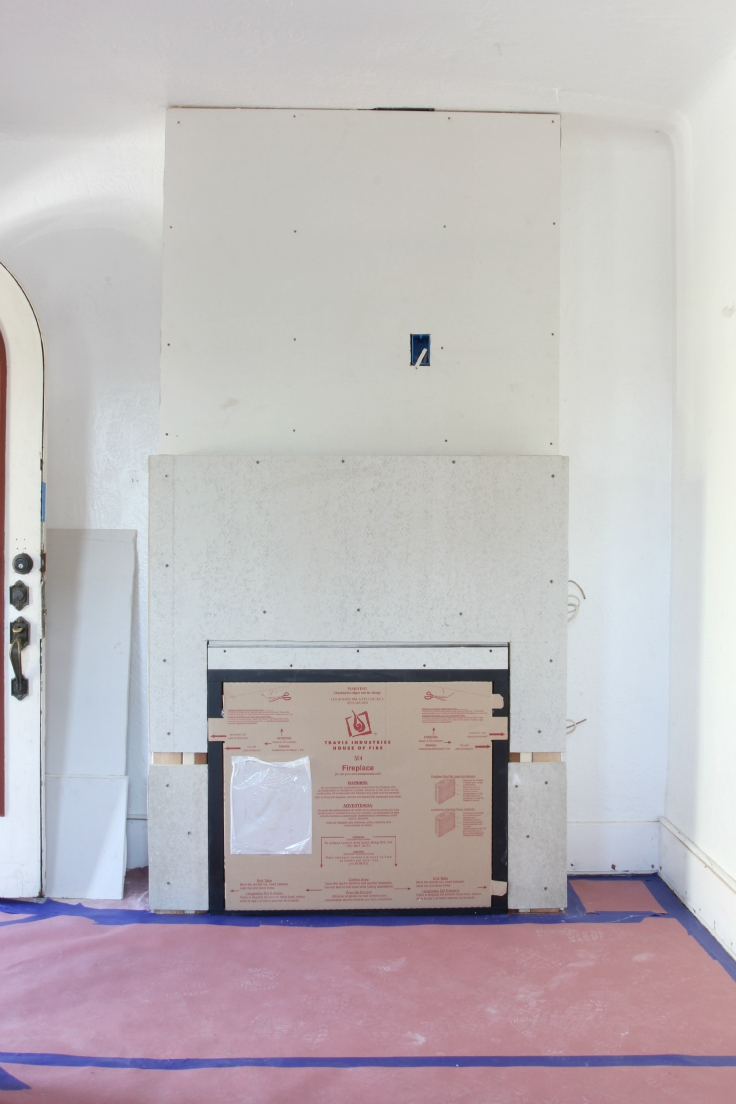
The Grit and Polish - Fireplace Construction 8
And this is where the tiling fun begins...
I really wanted to use patterned cement tiles on the fireplace surround. After searching the whole entire internet for the perfect tile, I landed on these, which I also used on the kitchen backsplash. I really liked the pattern and the black and white color scheme, plus I loved the free shipping that Overstock.com offered. (When I priced tiles at other sites, the shipping often cost more than the tile did.) At $18/sf, they were a big splurge, but I didn't need much of them so I felt justified in the expense. Plus I think it's worth spending extra on items that will have big impact, and I'm hoping this fireplace will be a big impact.
So let's talk tiling. It took me a couple of hours to lay the tiles on the fireplace surround. I already explained the process of laying cement tiles when I did the kitchen backsplash (here), so let's jump to how it looks...

The Grit and Polish - Fireplace Tile Collage 2
I'm super excited with how this fireplace is shaping up!
Okay, let's get down to the sealing and grouting process shown in the pictures above. One big issue with cement tiles is how porous they are. In order to minimize staining, you actually have to seal the tiles before grouting them. I followed the tile manufacturers recommendation and used a penetrating/impregnator sealer for this job. I applied one coat about two days after laying the tiles. Although it turned out fine, next time I'd probably do two or three coats of sealant, just to avoid any staining from the grout.
Speaking of grout, it took me a little while to decide on a color. I spent way too much time in the tile aisle of HomeDepot holding boxes of white Polyblend grout against a spare tile, praying I'd pick a color that wouldn't mess this fireplace up. In the end, I settled on Snow White, since it most closely matched the white of the tiles (in actuality it turned out a bit lighter, but I'm still really happy with it). Since I had laid the tiles with 1/4" spacing, I had to use sanded grout and unfortunately Snow White doesn't come pre-mixed in sanded. I really really hate mixing grout, so naturally I asked Garrett to mix it for me (hey, that's what husbands are for...right?!). He followed the directions on the back of the Polyblend box to a 'T' with one change: I had him add a splash of extra water (about 2 extra tablespoons). I know, I know, they warn you not to do this and then they warn you again. But I find grout soooooo hard to work with if you stick to the recommended ratio. And I swear, the grout turned out great, and it all looks lovely. So no harm done. I can't be the only one cheating on this...right?!
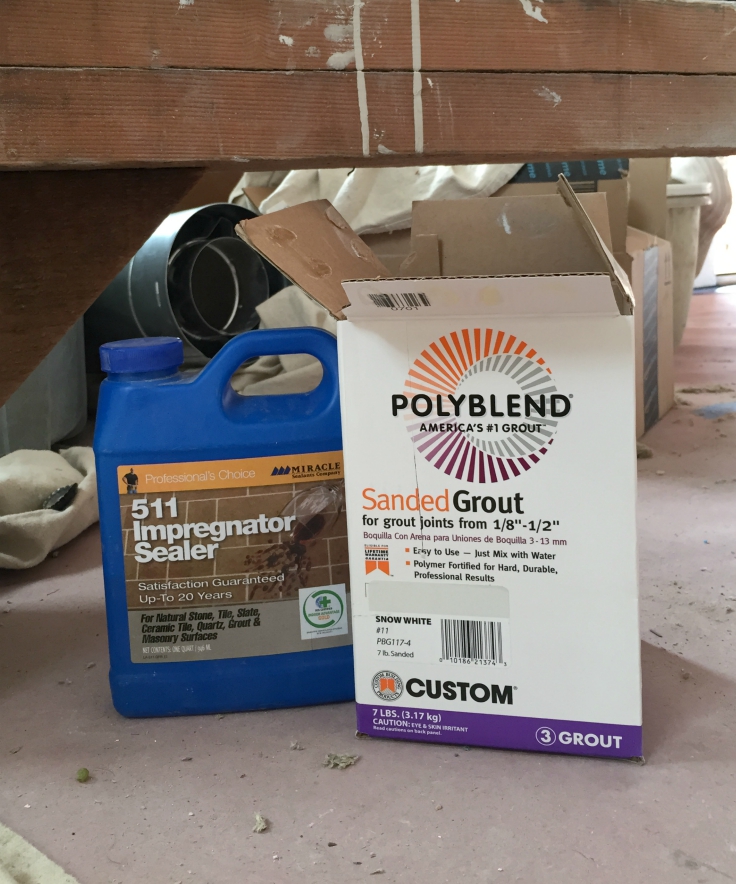
The Grit and Polish - Tile Products
When I came back a couple of days later to seal the tiles again I noticed a tiny bit of staining from the grout. It's really subtle, and I'm pretty sure no one else will notice, but it's definitely there. I also noticed a couple of scratches on the face of the tile that I'm pretty sure weren't there before, which I'm guessing are from the sand in the grout (which is probably why the manufacturer recommended non-sanded grout). Again, not something anyone else will probably notice, but something I will notice. Anyway, I ended up applying two more coats of sealer on the tile and grout (for a total of 3 coats) and called it good.
Next up, Garrett added rounded sheetroc corners to the edges of the fireplace with a coat of mud, and voila!...

The Grit and Polish - fireplace tile 17
Resources: tile | mortar | grout | sealant
Okay, I love this fireplace, but what about you?! Are you onboard with patterned cement tiles?!
Next up, paint and a mantle. I am dying to see how this project turns out!
xoxo
-Cathy
p.s. I really dig Bill Rancic. He seems like such a stand up guy, plus he's always renovating houses, which is pretty dang awesome. Take a look at his most recent project in Chicago.
p.p.s. Love how these DIY white concrete countertops turned out! At $900, concrete still seems like an expensive option, especially for a DIY, but lovely none the less.
p.p.p.s. Check out this Spanish Colonial in LA. I'm loving that sofa!