
Building a New Fireplace: Stove Selection and Framing
THE DEXTER HOUSE Guys, I have a favorite project at the Dexter House and it's going on right now! I feel a little guilty about picking a favorite from a whole house worth of renovation projects (I mean isn't that like picking a favorite child...which is just not cool) but there it is. I'm just that obsessed with the new fireplace we're building in the living room.
Okay, let me backup. The Dexter House has never had a fireplace. (I know! What a tragedy for an old house!) So when we decided to add a gas stove in the living room as part of our new heating system, I told Garrett that we needed to build it into a classically-shaped fireplace surround. This would give the room the dose of character that it was sorely lacking.
We kicked off this pet project by picking out a gas stove. Garrett's Aunt and Uncle own a great stove shop in our home town of Ellensburg, WA. Which is awesome because Garrett got to work there growing up and is now pretty proficient at installing gas stoves (a task I may leave to a professional otherwise). Having family in the business is also awesome because friendly advice is never more than a phone call away...even if you need it on Christmas! ;) Garrett picked out a Lopi Fireplace stove with heating capacity to 1400sf. I picked out a curved black face plate and an old-world stucco interior and I'm pretty sure it's going to look awesome! Thanks Aunt Sue and Uncle Greg!!!
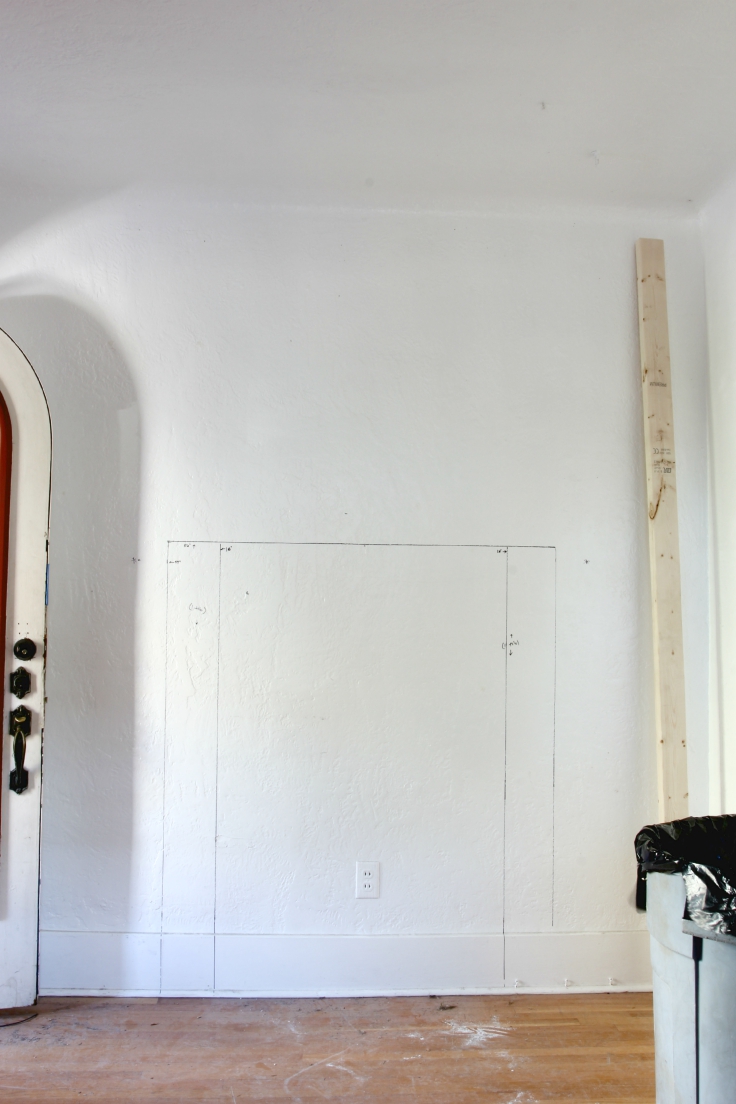
So with our stove selected, we set about framing a new fireplace. The stove sits close to the front door, so we wanted to build something that didn't stick out from the wall too far. We started by recessing a spot for the stove into the wall. I took out a section of lath and plaster and the studs behind them (we replaced the studs with flat 2x4's to make sure the wall was supported and the opposing lath and plaster had something behind it). I worked slowly, mindful not to damage the surrounding wall or the plaster on the opposing side of the wall.


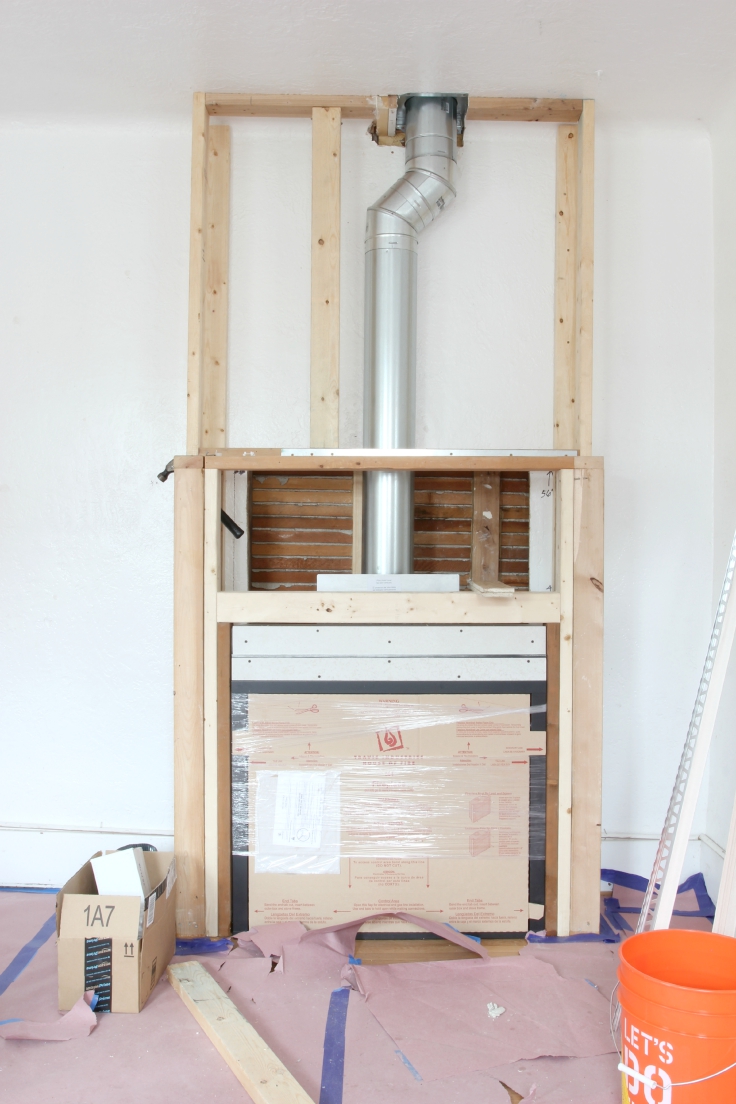
Next we framed the portion of the fireplace that extends out from the wall. We made sure to follow all clearance requirements per the stove manufacturers' specifications and built the fireplace surround as small as the manufacturer allowed.

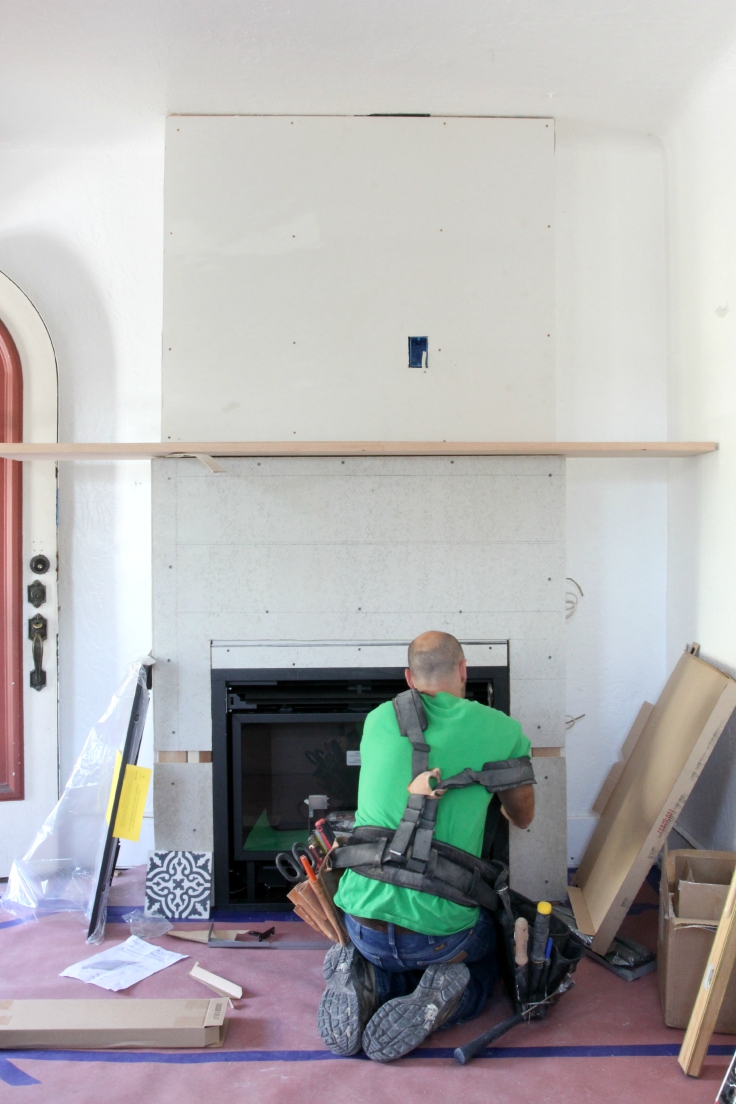
Since we plan to hang a TV above the mantle, we outfitted the fireplace with electrical and data plugs. And then Garrett and Papa slid the stove into the opening and secured it before cladding the whole thing in drywall and hardiboard.
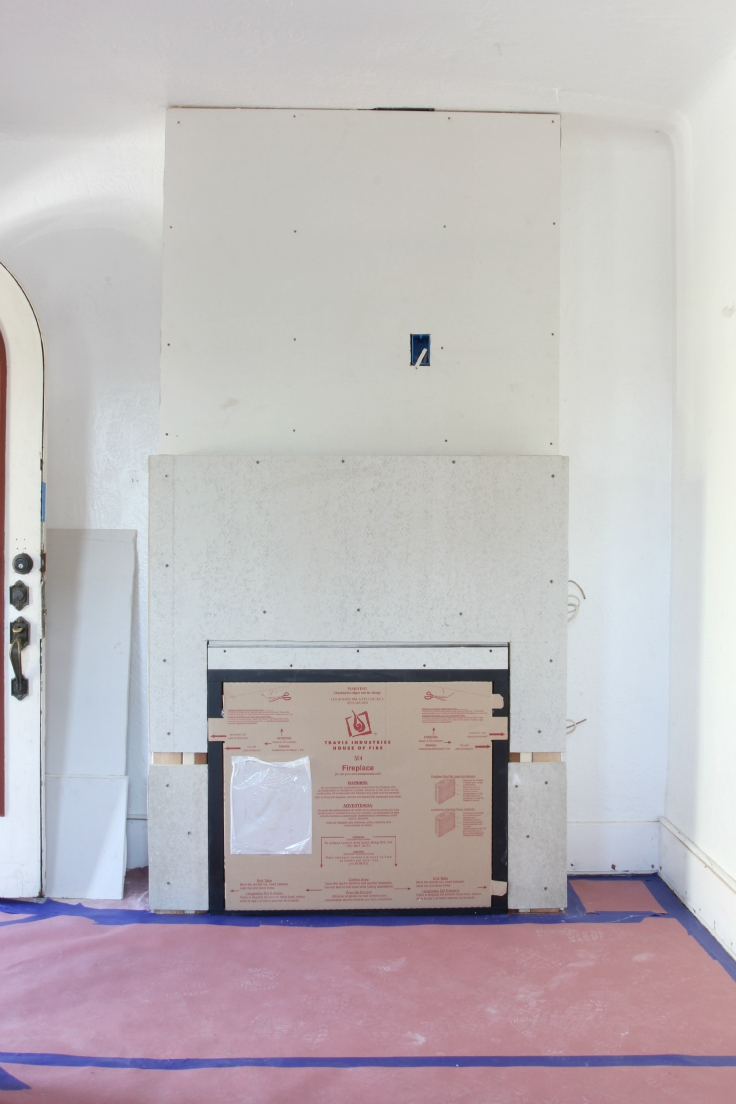
And there it is...a brand new fireplace ready for tile! I'm actually finishing up grout right now, so will save all that for a separate post, but suffice it to say that I am ridiculously giddy about our new fireplace. There's just no hiding it, this really is my favorite project at the Dexter House!!!
xoxo
-Cathy
p.s. I'm digging this Spanish home tour, especially all those steel doors!
p.p.s. Who says you can't decorate a rental?!
p.p.p.s. I really love the faux painted-brick treatment shown here. It's got me thinking about all the great places you could use it (kitchen backsplash anyone?!).