
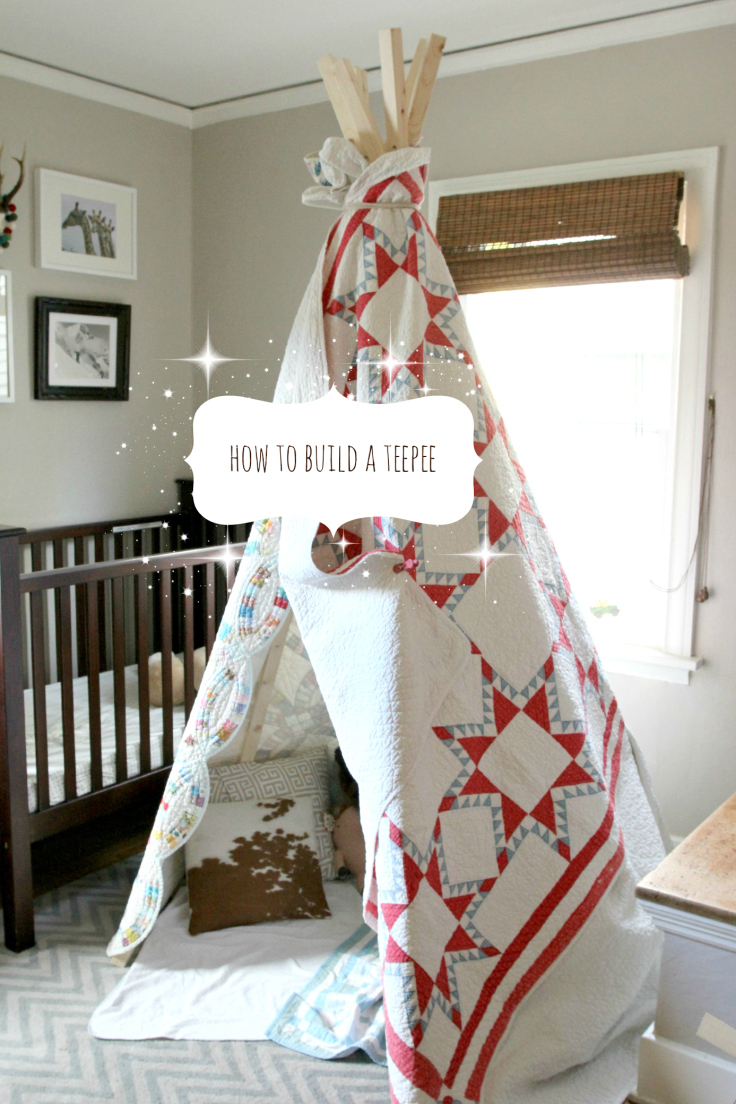
DIY: How to Build a Play Teepee (for $22)!
THE RAVENNA HOUSE Hey guys! I hope you're not sick of teepees yet, because I've got a lot of teepee to show you today. Wilder and I built one over break and I'm obsessed!
I've actually had a play teepee on my mama to-do list for a good few months now (as many of you do too...right?!!!), so I couldn't be happier to share the results with you. The good news: it was inexpensive and really easy to build with my little guy. And if you're waiting for the bad news to drop, you can stop. It's all golden light and fairy dust here in teepee land!
If you find yourself in need of a little teepee action, here's a rundown of the materials you'll need:
- six 2"x2"x8' posts (we used inexpensive white wood, but any wood should do; you can also do taller or shorter posts depending upon your space)
- at least 1o feet of rope
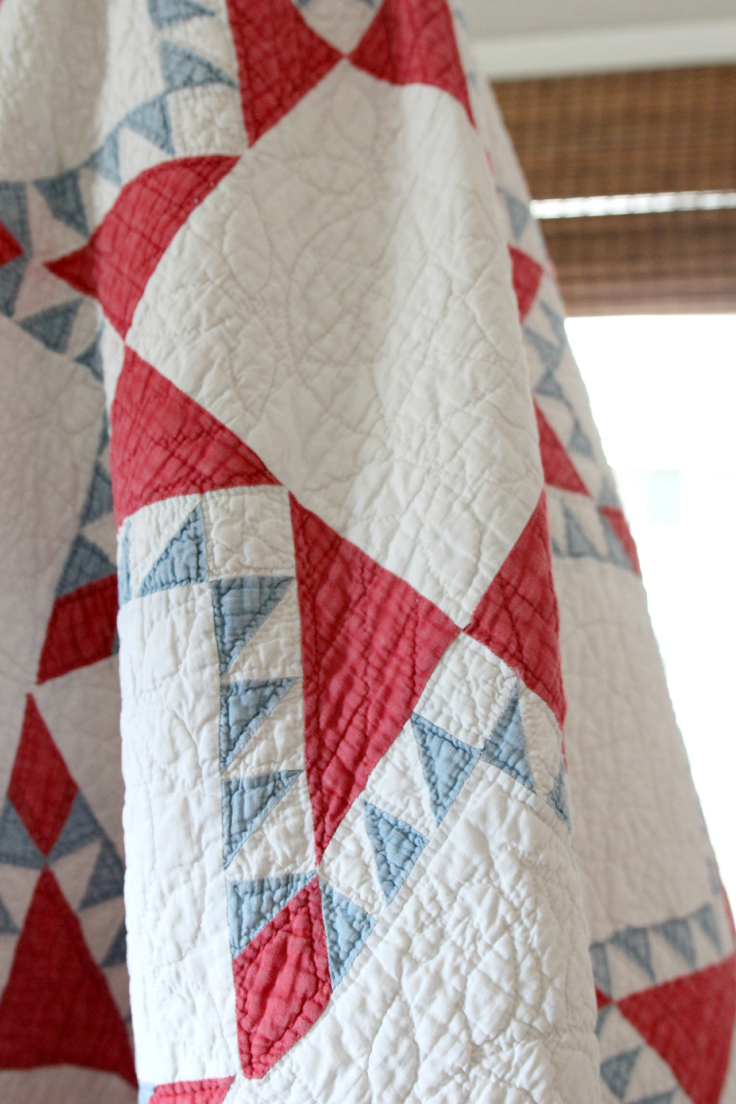
- 3 quilts (we used 1 double-sized and 2 full-sized quilts)
- a well-rested helper and an hour and a half of free time...still waiting on that rested helper myself, but here's to hoping...!
You'll also need the following tools:
- cordless drill outfitted with a drill bit that's slightly larger than your rope (we used a 3/8" bit)
- tape measure and pencil (or a ruler stick and purple crayon if you happen to building it in a kid's room)
Now for the fun part, building a teepee (!!!):
Step 1. Start by marking your 2"x2" posts about 10" from one side.
Step 2. Drill out a hole at the center of each post at the marks you just made.

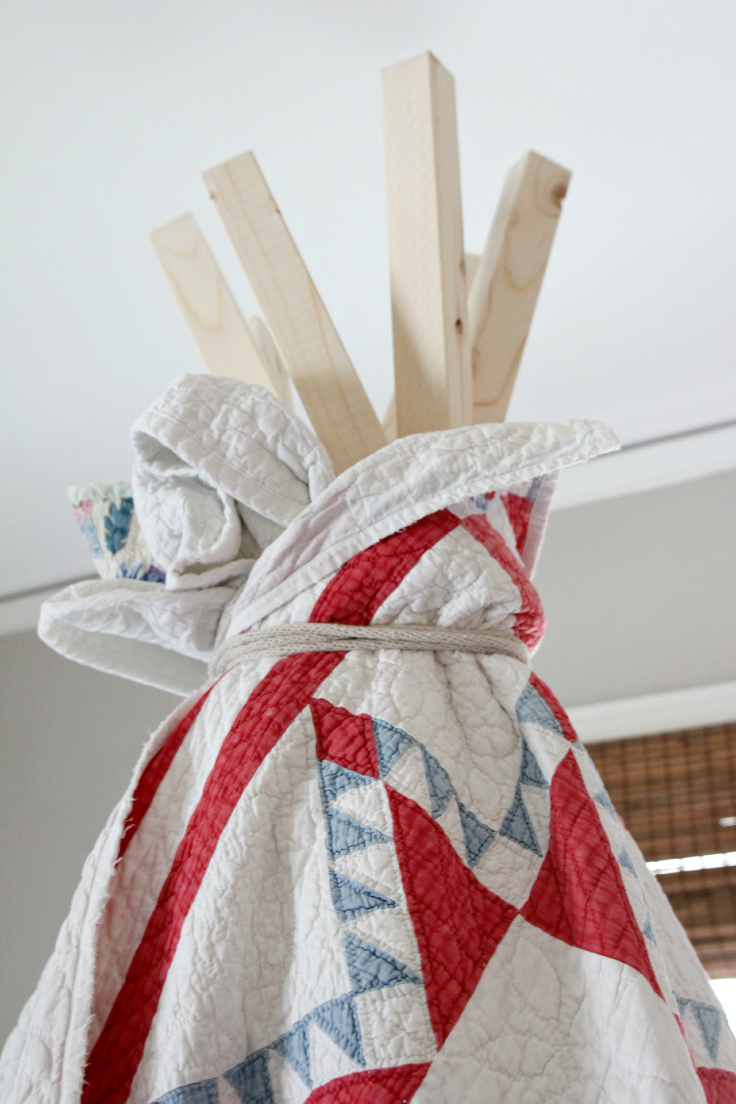
Step 3. Set the posts (with the hole you drilled on top) one at a time in the spot you want the teepee and thread the rope through the holes after each post is set. Keep 6" of rope before the first post and pull the rope tight between each post.

Step 4. Once you have the posts set in the shape you want and the rope threaded through all the holes, pull the rope tight and tie a knot using the 6" at the start of the rope and the section after the last post. The tighter the rope and knot, the less wiggly the teepee will be.
Step 5. Now the fun part...hanging the quilts! Since I didn't have a full-sized helper to assist with this part, I hung one quilts one at a time. After placing the first quilt, I wrapped the rope around the quilt at the top (where the rope is threaded through the holes) and tied a knot. I repeated this with each quilt, making a circle with the rope after each quilt, until all three were secured at the top of the teepee.

Step 6. Any excess rope can be cut or wrapped around the exterior of the quilts and tied.
Step 7. To create a door (and hopefully keep sticky fingers from handling the antique quilt too much), I pulled the corner of the last quilt back and secured it with a clip.
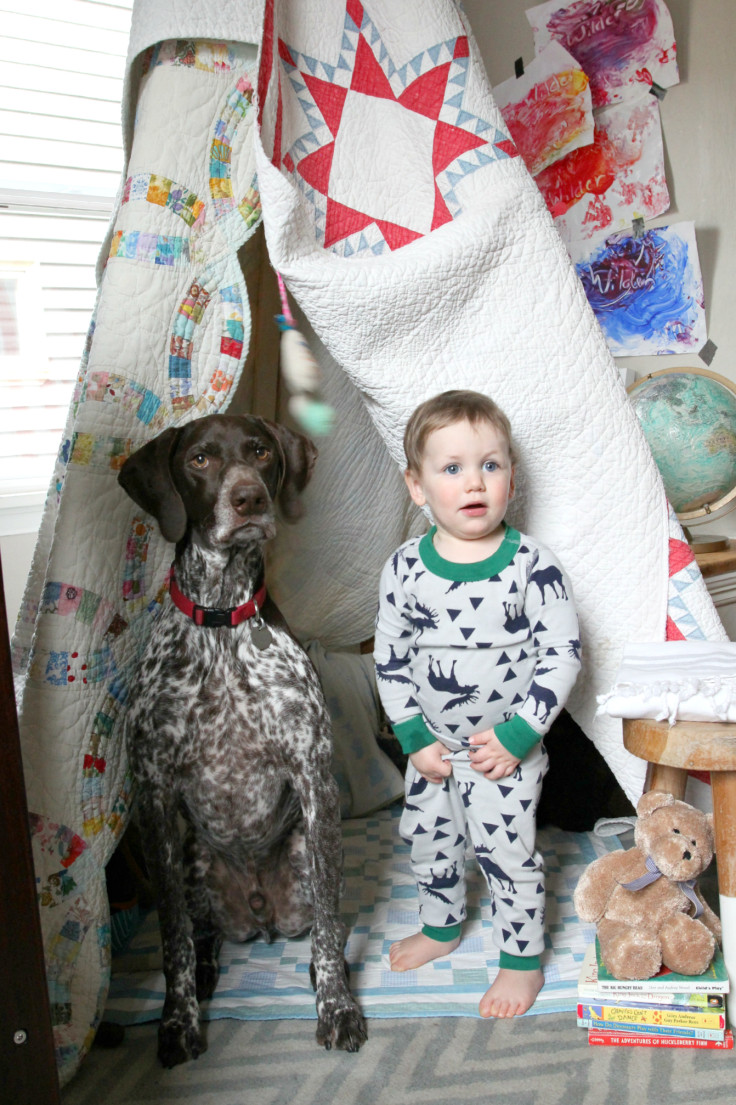
Then it was game on...for Wilder and Bubba!


I love that last picture. It's like they both know they're in trouble, but Wilder's playing it off like, "who, me?! No, no, no it was Bubba!" But then he feels bad, so he gives Bubba a kiss...
Hopefully you can see that teepee land is amazing! It's somewhere between Oz and Neverland but without all the scary stuff. Wilder, Bubba, and I spent the first evening in there cuddling and reading story after story with Otto the bear, Moo the pig and Fox the fox (Wilder is great at naming stuffies!). And Wilder was jumping up and down with excitement to give dada a tour when he got home from work.

Oh and did I mention how cheap this project was? $22. That's right, $22! Of course we only had to buy the posts since we had the antique quilts and rope sitting around. But still, it seems crazy cheap compared with the $150-$250 teepees I found at Pottery Barn Kids and Land of Nod. Plus I'm 100% sure we have already got a whole lot more than $22 of fun out of this teepee!
This was a really fun, inexpensive, and painless project to build with the little guy. In fact it was so fun, that I'm itching to do another DIY project with Wilder...any suggestions?!
Resources: Large stuffed bear, Pottery Barn Kids | teepee quilts, antiques | quilt on floor, made by my mom | all other room resources, here and here.
xoxo
-Cathy